Deploy Application
Broadly speaking, software deployment consists of all the porcesses required for preparing the a software application to run and operate in a specific environment. It involves installation, configuration, testing and making changes to optimize the performance of the software. In Wyliodrin Studio, deploying an application basically means to put it into production, after its prototype is finished and tested.
For the moment Wyliodrin Studio provides support just for Docker. The application will be deployed in a container, which is a standard unit of software that packages up code and all its dependencies so the application runs quickly and reliably. In this way the app will be able to start automatically and run in the background.
This feature contains two main parts.
Deploy an Application
Start a deployment
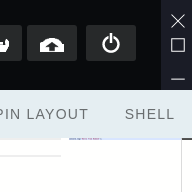
To deploy a project you have to use the Deploy button.
After pressing it, the Dockerfile pop-up will appear.
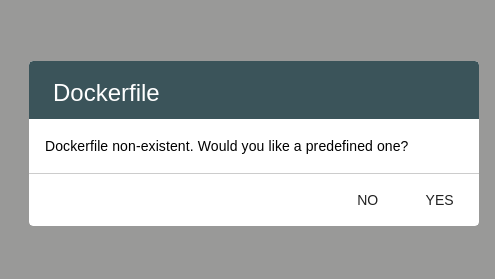
This means that you do not have any dockerfile in the folder of your project. You now have the posibility to create a dockerfile through Wyliodrin Studio, or to make one of your own.
Setup the deployment
You will be able to customize your dockerfile in the Deployment Settings pop-up.
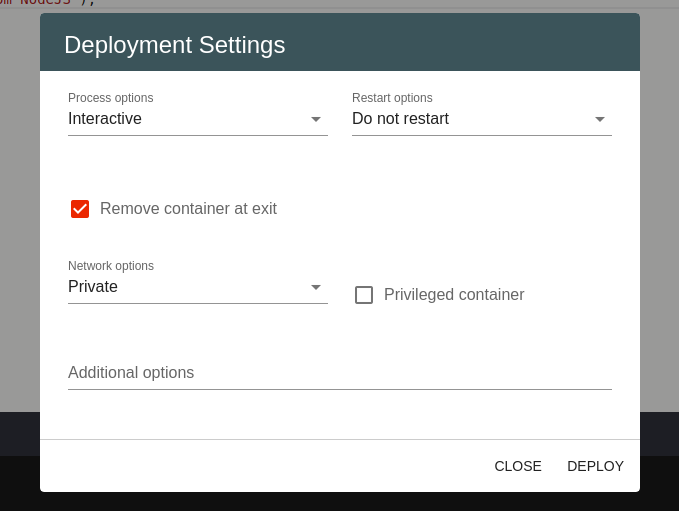
In this dialog, you have multiple options to customize you dockerfile. The process options are:
| Interactive | the container is running in the foreground and has the console attached |
| Service | the container is running in detached mode |
The restart options are:
| Do not restart | do not automatically restart the container when it exits |
| Always | restart the container always, regardless of the exit status |
| On failure | restart the container only when it exits with a non-zero status |
| Unless stopped | always restart the container, except if it was put into stopped state before the Docker daemon was stopped. |
The network options are:
| Private | use docker’s default networking setup |
| Same as device | use the host’s network stack inside the container |
Other options are:
| Remove container at exit | automatically clean up the container and remove the file system when the container exits |
| Priviledged container | give extended privileges and acces to all devices to the container |
As you can see, there are already some default options set. However, you can always change them or add other options that you need in the Additional Options field.
By doing these actions, you succesfully deployed your project in a container. This container has the same name as your project and can be found in the Deployments pop-up.
Manage Deployments
Wyliodrin STUDIO allows you to manage your deployed apps. By pressing the Deployments button you can manage both your containers created in Wyliodrin Studio, and the ones created locally on your machine.
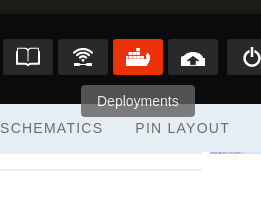
After pressing this button you will be shown a list of all the containers.
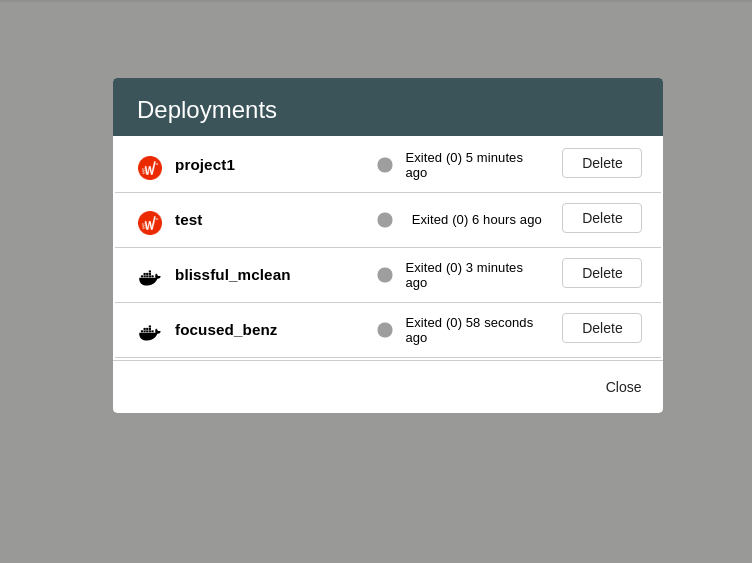
In the list you will find two types of containers. The ones with the Wyliodrin Studio logo are the one created inside the application, whilst the ones with the docker icon are created locally. You may also see in which state the container can be found in that particular moment, as well as delete or stop the containers.